
So you’ve decided to embark on the adventure of RV camping. Congratulations! But before you hit the road, it’s important to understand how to hook up and make use of the various utilities your RV offers. From water to electricity to sewage, this beginner’s guide will walk you through the steps and give you the confidence to navigate these essential aspects of RV life. So buckle up and get ready to learn the ropes of RV utilities!
Understanding RV Utilities
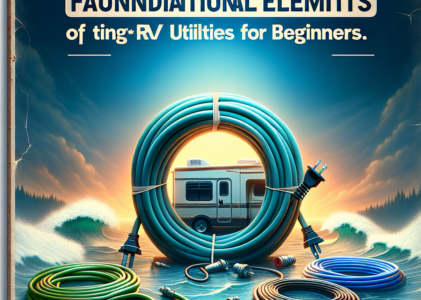
Introduction to RV Utilities
RVs, or recreational vehicles, provide a unique and adventurous way to travel and explore the world around you. These homes on wheels offer everything you need for a comfortable journey, including essential utilities such as water, electricity, sewage, and propane. Understanding how to properly hook up and use these utilities is crucial for a smooth and enjoyable RV experience. In this comprehensive guide, we will walk you through the process of hooking up and using RV utilities, ensuring that you have all the knowledge you need to make the most of your recreational vehicle.
Importance of Hooking Up and Using RV Utilities Correctly
Properly hooking up and using RV utilities is not only important for your overall comfort and convenience but also for the safety of your RV and the environment. Failing to follow the correct procedures can lead to leaks, damage to your systems, or even potential hazards. By understanding the importance of connecting and using RV utilities correctly, you can avoid unnecessary problems and ensure a seamless and trouble-free journey. With that in mind, let’s dive into the specifics of each utility and how to utilize them efficiently in your RV.

Water Hookup and Usage
Connecting the Water Hose
When it comes to connecting your RV to a water source, it’s essential to follow a few key steps. First, ensure that your RV’s water system is switched off and the water tank is drained. Then, connect your water hose to the designated water hookup on your RV, making sure it fits securely. Once connected, turn on the water supply gradually to avoid sudden pressure surges. Check for any leaks or dripping connections and make any necessary adjustments. Remember, a secure and leak-free connection is vital for efficient water usage during your travels.
Understanding Water Pressure Regulators
Water pressure regulators play a crucial role in protecting your RV’s plumbing system from excessive pressure that can result in bursts or leaks. These devices help regulate the water pressure coming from external sources, such as campsites or RV parks. To use a water pressure regulator, simply attach it to the water source before connecting your water hose. This will ensure that the water pressure entering your RV is within safe limits, preventing any damage to your plumbing system.
Filling Up the Fresh Water Tank
If you’re planning to go off-grid or don’t have access to a water hookup, filling up your RV’s fresh water tank is necessary. Locate the fresh water fill on your RV and use a designated hose or container to fill it up. Be mindful not to overfill the tank as it may lead to overflowing. Once filled, your fresh water tank will supply water to your faucets, toilet, and shower, allowing you to use them even when there is no external water source available.
Using Water Conserving Fixtures
While traveling in an RV, it’s important to be mindful of water conservation. By installing water-conserving fixtures, such as low-flow faucets and showerheads, you can minimize water usage and make your water supply last longer. These fixtures reduce the flow of water without compromising the quality of your shower or washing experience. Additionally, consider using the “navy shower” method, where you turn the water on briefly to wet yourself, then again to rinse off. This technique can significantly reduce your overall water consumption.
Handling Water Leaks or Issues
Water leaks or other issues in your RV’s water system can be frustrating and potentially lead to a significant waste of water. If you notice any leaks, drips, or unusual water flow, it’s important to address them promptly. Start by checking all water connections for loose or damaged fittings and tighten or replace them as needed. If the issue persists, it may be helpful to consult a professional RV technician who can diagnose and fix the problem effectively.
Electricity Hookup and Usage
Understanding RV Electrical Systems
Understanding your RV’s electrical system is essential for safe and efficient power usage. Most RVs have a combination of AC (alternating current) and DC (direct current) systems. The AC system powers appliances such as air conditioners, microwave ovens, and power outlets, while the DC system provides power to lighting and runs components like the water pump and refrigerator. Your RV may be equipped with a circuit breaker panel that allows you to control and manage the various electrical circuits within your vehicle.
Shore Power Connection
When hooking up your RV to an external power source, known as shore power, there are a few important steps to follow. Start by ensuring that the main breaker on your RV’s electrical panel is in the “off” position. Then, plug your RV’s power cord into the shore power pedestal, making sure it is securely connected. Once connected, switch the main breaker to the “on” position, and your RV will now be powered by the external electricity source. This connection allows you to utilize all electrical appliances and devices within your vehicle without relying on your RV’s internal battery power.
Using an RV Generator
In situations where shore power is not available, or you prefer to rely on your RV’s internal power source, an RV generator becomes an invaluable resource. RV generators run on either gasoline, diesel, or propane and provide the electricity needed to power your RV’s appliances and systems. Before using an RV generator, make sure to read the manufacturer’s instructions carefully and follow all safety guidelines. Additionally, be considerate of noise constraints in camping areas by positioning the generator in a designated location away from other campers.
Managing Power Consumption
In an RV, managing power consumption is crucial to prevent overloading your electrical system and draining your battery quickly. To efficiently manage your power usage, it’s essential to be aware of the power requirements of your appliances and devices. Consider using energy-efficient appliances, LED lighting, and turning off or unplugging any unnecessary electronics. Additionally, utilizing propane-powered appliances, such as stoves or refrigerators, can help reduce electricity consumption. Being mindful of your power usage will extend the lifespan of your battery and prevent unexpected power outages during your trip.
Troubleshooting Electrical Problems
Despite taking all necessary precautions, electrical problems may still arise during your RV adventures. If you encounter any electrical issues, start by checking your circuit breaker panel to ensure that none of the breakers have tripped. If a breaker has tripped, reset it and monitor the situation to see if the problem persists. If the issue continues or you’re unsure about the cause, it’s best to consult a professional electrician or an RV technician who can troubleshoot and repair any electrical problems effectively.

Sewage Hookup and Usage
Types of RV Sewage Systems
RVs typically have either a cassette toilet or a holding tank sewage system. Cassette toilets consist of a removable waste cassette that needs to be manually emptied, while holding tank systems store waste until they can be emptied at a designated dump station. Understanding the type of sewage system in your RV is essential for proper usage and maintenance.
Connecting the Sewer Hose
When it’s time to empty your RV’s sewage tank, connecting the sewer hose correctly is crucial to avoid any spills or leaks. Start by ensuring that the RV’s black tank valve is closed, and the dump station’s sewage outlet is securely sealed. Attach one end of the sewer hose to your RV’s sewage outlet, making sure it is tightly connected. Then, connect the other end of the hose to the dump station’s sewage inlet, following any specific guidelines provided. Once connected properly, open the black tank valve and allow the waste to flow into the dump station.
Dumping and Monitoring the Black Tank
Emptying the black tank, which holds solid waste, requires some additional precautions. Start by wearing disposable gloves to protect yourself from any potential bacteria or contamination. When at a dump station, open the black tank valve gradually to allow the waste to flow out steadily. It’s vital to monitor the tank level and ensure it is adequately emptied. Some RVs may have built-in tank sensors, while others require manual checking. Rinse the black tank with water, following any manufacturer recommendations, and close the valve once the tank is empty.
Flushing and Maintaining the Holding Tanks
Maintaining the holding tanks is essential to prevent odors and maintain proper functionality. After emptying the black tank, it’s important to flush it with clean water to remove any remaining waste. Some RVs have built-in tank flush systems, while others require a separate flushing attachment. Additionally, regularly adding tank treatments designed to break down waste and control odors can help keep your holding tanks clean and functioning optimally. Follow the manufacturer’s instructions for the specific tank treatment you choose to ensure proper usage and effectiveness.
Handling Sewage System Problems
While properly maintaining your RV’s sewage system should prevent many issues, occasional problems may still occur. If you encounter a clog or blockage, using an appropriate sewer hose attachment or a dedicated tank-cleaning wand can help dislodge any obstructions. It’s crucial to never use your freshwater hose for such purposes to avoid cross-contamination. If the problem persists or you experience complex sewage system issues, seek the assistance of a professional RV technician who can diagnose and remedy the situation effectively.
Propane Usage and Safety
Introduction to RV Propane Systems
Propane plays a vital role in providing heat, hot water, and fuel for cooking in many RVs. Understanding how to safely and efficiently use propane is essential for a comfortable and enjoyable RV experience. Propane systems in RVs typically consist of a propane tank, a regulator, and various propane appliances.
Checking Propane Levels
Before embarking on your RV journey, it’s crucial to check your propane levels to ensure you have an adequate supply for your trip. Most RVs have a propane gauge that allows you to monitor the level of propane remaining in the tank. Alternatively, you can use a handheld propane level indicator or simply weigh the tank to estimate the propane level. It’s important to plan ahead and refill your propane tank when the level is low to prevent running out of fuel during your travels.
Refilling Propane Tanks
Refilling propane tanks can typically be done at dedicated propane filling stations or RV service centers. While some RVers choose to exchange their empty tanks for filled ones, others prefer refilling their existing tanks for cost-effectiveness. Follow all safety guidelines when refilling your propane tank, such as turning off all propane appliances and ensuring no open flames or sparks are present during the process. Additionally, be aware of the specific regulations and requirements of the propane filling station you choose to visit.
Using Propane Appliances
Propane appliances, such as ovens, stoves, furnaces, and water heaters, are designed to operate efficiently and reliably in an RV. However, it’s essential to become familiar with the proper usage and maintenance instructions provided by the manufacturer. Always follow safety precautions and guidelines, such as ensuring proper ventilation and inspecting any visible gas leaks before operating propane appliances. Regularly clean and maintain your propane appliances to maximize their lifespan and prevent any potential safety hazards.
Propane Safety Precautions
Safety should always be a top priority when it comes to propane usage in your RV. Keep in mind the following safety precautions to ensure a secure and hazard-free environment:
- Regularly inspect propane lines, fittings, and appliances for leaks or damage.
- Install carbon monoxide and propane gas detectors in your RV to monitor for potential leaks or buildup.
- Never store or use propane cylinders or tanks indoors, as they should always be kept in well-ventilated areas.
- Before traveling, secure all propane cylinders and tanks properly to prevent shifting or damage.
- Familiarize yourself with the location and operation of the propane shut-off valve in case of emergencies.
- If you suspect a gas leak, turn off the propane supply immediately, ventilate the area, and seek professional assistance.
By following these safety precautions and guidelines, you can enjoy the benefits of propane usage in your RV while prioritizing the safety of yourself and those around you.

Water Filtration and Treatment
Importance of Water Filtration
Access to clean and safe water is essential during your RV travels. While potable water may be available at campsites or RV parks, it’s important to note that the quality can vary. Water filtration helps remove impurities, contaminants, and potential harmful bacteria, ensuring that your water is safe and suitable for drinking, cooking, and other uses.
Choosing and Installing a Water Filter
Choosing the right water filter for your RV is crucial for effective filtration. There are various types of water filters available, including inline filters, under-sink filters, and faucet-mounted filters. Consider factors such as filtration capacity, micron rating, and ease of installation when selecting a water filter. Follow the manufacturer’s instructions to install the filter correctly, ensuring that it is securely connected to your RV’s water system.
Additional Water Treatment Options
In addition to filtration, you may opt for additional water treatment methods to further enhance water quality. Water softeners, for example, help reduce mineral content in hard water, preventing the buildup of scale on faucets and fixtures. Ultraviolet (UV) purifiers use UV light to kill bacteria and other microorganisms present in your water. Water sanitization tablets and chlorine-based treatments are also available, offering a convenient solution for disinfecting and sterilizing water when needed.
Maintaining and Replacing Filters
Regular maintenance and filter replacement are crucial to ensure continued effectiveness and efficiency of your water filtration system. Follow the manufacturer’s recommendations for filter lifespan, replacement intervals, and any necessary maintenance procedures. It’s important not to overlook filter replacement, as using expired filters may compromise water quality and increase the risk of contamination. By staying diligent with filter maintenance and replacement, you can enjoy clean and safe water throughout your RV adventures.
Electrical Surge Protection
Understanding Electrical Surges
Electrical surges, also known as power spikes, can occur when there is a sudden increase in voltage within an electrical system. These surges can potentially damage sensitive electronics and appliances in your RV. Understanding the causes and risks associated with electrical surges is essential for protecting your RV’s electrical components and preventing costly damages.
Choosing and Installing Surge Protectors
Surge protectors serve as a safeguard against power spikes, diverting excessive voltage away from your RV’s electrical system. When selecting a surge protector, consider factors such as voltage rating, joule rating (indicating the surge protector’s ability to absorb energy), and the number of outlets required. Install surge protectors between the external power source and your RV’s power inlet to ensure all electrical connections are protected.
Features to Look for in Surge Protectors
When choosing a surge protector for your RV, consider additional features that can enhance its protective capabilities. Look for surge protectors with built-in diagnostic features, such as LED indicators that show the state of the electrical power source. Some surge protectors offer automatic shutdown functions to protect against low voltage or faulty wiring. Additionally, advanced surge protectors may include additional features such as voltage regulation or noise filtering to further stabilize the electrical supply.
Testing and Replacing Surge Protectors
Periodic testing of surge protectors is essential to ensure their effectiveness. Most surge protectors have a test button that allows you to verify their functionality. Press the test button and observe if the surge protector shuts down the power as intended. If the surge protector fails the test or has been exposed to a significant surge event, it may need to be replaced. Follow the manufacturer’s guidelines for surge protector replacement intervals and consult a professional if you have any concerns about your RV’s surge protection system.

RV Battery Maintenance
Types of RV Batteries
RVs typically use deep cycle batteries, which are designed to provide continuous power over a long period. These batteries are different from automotive batteries designed for starting engines. Common types of RV batteries include lead-acid batteries, such as flooded or AGM (absorbent glass mat) batteries, and lithium-ion batteries known for their durability and longer lifespan.
Checking Battery Levels
Regularly monitoring your RV’s battery levels helps ensure you have sufficient power for all your electrical needs. Most RVs have a battery monitor panel that displays the battery charge level. Alternatively, you can use a handheld battery monitor or a multimeter to check the voltage. It’s important to monitor both the house battery (used for powering appliances and lighting) and the chassis battery (used for starting the engine). If the battery level is low, recharge or replace the battery as needed.
Cleaning and Maintaining Batteries
Proper maintenance of your RV’s batteries is essential for their longevity and optimal performance. Regularly clean the battery terminals and connections using a battery terminal cleaner or a mixture of baking soda and water. Ensure that the connections are tight and free from corrosion. Additionally, periodically inspect the batteries for any signs of damage or leaking and address any issues promptly. Maintaining batteries at their recommended charge levels and avoiding over-discharging helps extend their lifespan.
Charging and Replacing Batteries
To keep your RV batteries charged, you have several options. Using shore power or an RV generator with a built-in battery charger is a common method. Solar panels are another popular choice as they harness sunlight to generate electricity and charge your batteries. When replacing your RV’s batteries, consider factors such as capacity, voltage, and compatibility with your RV’s electrical system. Consult the manufacturer’s guidelines and consider seeking professional assistance to ensure proper installation and compatibility.
Managing RV Energy Efficiency
Tips for Energy Efficiency in an RV
Maintaining energy efficiency in your RV can help conserve power, extend battery life, and reduce overall energy consumption. Consider implementing the following tips to maximize energy efficiency:
- Use LED lighting: LED bulbs are energy-efficient and last longer than traditional incandescent or halogen bulbs.
- Optimize thermostat settings: Adjust your thermostat to conserve energy when heating or cooling your RV. Utilize insulation methods, such as window coverings or door draft stoppers, to minimize heat transfer.
- Turn off or unplug unused electronics: Switch off or unplug electronics that are not in use to prevent phantom power draw.
- Utilize natural light: Take advantage of natural sunlight during the day to minimize the need for artificial lighting.
- Monitor refrigerator temperatures: Ensure that your RV’s refrigerator is set to the appropriate temperature to avoid overcooling and excessive energy consumption.
- Limit propane usage: Use propane appliances for cooking and heating whenever possible to reduce electricity consumption.
Using Solar Energy
Solar power is a sustainable and renewable energy source that can be utilized to charge your RV’s batteries and power various appliances. Installing solar panels on the roof of your RV allows you to capture sunlight and convert it into usable energy. However, it’s essential to consider factors such as available roof space, sunlight exposure, and power requirements when installing solar panels. Consult a professional or follow manufacturer recommendations for correctly sizing and installing solar panels on your RV.
Insulating and Ventilating the RV
Proper insulation and ventilation play a vital role in maintaining a comfortable and energy-efficient RV interior. Insulating your RV’s walls, roof, and windows helps regulate interior temperatures, preventing heat loss in cold climates, and minimizing heat gain in hot climates. Utilize weatherstripping to seal any gaps or cracks around doors and windows, ensuring that conditioned air does not escape. Installing vent covers allows for proper airflow and ventilation while preventing unwanted elements from entering your RV.
Updating Inefficient Appliances
If your RV has outdated or inefficient appliances, consider upgrading to more energy-efficient models. Newer appliances such as refrigerators, air conditioners, or water heaters are designed to consume less energy while providing the same or better performance. Look for ENERGY STAR certified appliances, as they meet strict energy efficiency guidelines set by the Environmental Protection Agency (EPA). While these upgrades may require an initial investment, you can save energy and reduce energy costs in the long run.

GPS and Navigation
GPS Systems for RVs
Navigating your RV safely and efficiently is essential for a successful trip. GPS systems specifically designed for RVs can provide valuable information and guidance to ensure a stress-free journey. These GPS units take into account factors such as vehicle height, weight, and length, as well as road restrictions and RV-specific points of interest. RV GPS systems often include features like alerts for low bridges, campgrounds, fuel stations, and real-time traffic updates.
Choosing and Installing GPS
When choosing a GPS system for your RV, consider the specific features and functionality that align with your needs. Look for GPS units that offer reliable and accurate navigation, detailed maps, and regular software updates. Mount the GPS unit in a suitable location within your RV for easy viewing, ensuring that it does not obstruct your view of the road or create any distractions while driving.
RV-Specific Navigation Apps
In addition to dedicated GPS devices, there are also numerous RV-specific navigation apps available for smartphones and tablets. These apps provide similar functionalities to standalone GPS units and are frequently updated with road changes, RV-friendly routes, and other relevant information. Many RV navigation apps offer offline maps, which can be particularly useful when traveling to areas with limited cellular coverage.
Additional Navigation Tips and Resources
In addition to utilizing GPS systems and navigation apps, it’s essential to be prepared and gather information from reliable sources before your journey. Research your route in advance and familiarize yourself with any driving restrictions, low clearance bridges, or toll roads that may impact your RV. Reference RV-specific road atlases or online resources that provide detailed information on campgrounds, RV-friendly services, and amenities along your route. By combining various navigation tools and resources, you can navigate your RV confidently and enjoy a smooth and stress-free journey.
Taking the time to understand and master the hooking up and usage of RV utilities is essential for an enjoyable and hassle-free adventure. Whether it’s water, electricity, sewage, propane, or navigation systems, efficiently utilizing these utilities ensures your comfort, safety, and overall satisfaction with your RV experience. By following the comprehensive guide provided here, you’ll be well-equipped to maximize the potential of your RV and make memories that last a lifetime. So, hit the road, embrace the freedom of RVing, and enjoy all the conveniences that come with mastering these essential utilities. Happy travels!